


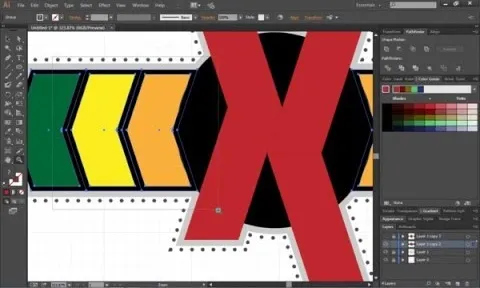
First thing you need to do this is to select rectangle tool and make a shape and select the gradient fill and change the angle of gradient to 90 degree. Now color and resize it as showing in the video. Now type your navigation texts like blog, contact, gallery etc. Now size your text for your rectangle shape. Now set the texts in the bar and resize your bar. Now color your text and stroke it then decrease the stroke rate. Now again draw a rectangle as showing in the video and move the path below the text path in layer window. Then choose the gradient fill and set it to 90 degree and create the gradient like in the video. Now select your path and give it a stroke and edit the gradient and other things as showing in the video and you are done.
Apple's iOS 26 and iPadOS 26 updates are packed with new features, and you can try them before almost everyone else. First, check Gadget Hacks' list of supported iPhone and iPad models, then follow the step-by-step guide to install the iOS/iPadOS 26 beta — no paid developer account required.


Comments
Be the first, drop a comment!